

We show you all the sanctuaries that are in the Kolog Forest of Tears of the Kingdom and how to complete each one.
We continue solving the puzzles that hide the lands of Hyrule with their shrines, this time all of the Kolog Forest from Zelda: Tears of the Kingdom. Area map north and surroundings, without entering Hebra or Eldin. You can see the solution to each one in this same guide, a little further down.
There is a total of 10 shrines in and around the Kolog Forest, in general we cover those in the north of the Hyrule region. You can take a look at the image below and locate them all.

Kolog Forest Shrines in Zelda Tears of the Kingdom
Next you have a list with all the sanctuaries and later the independent solution to each one.
- Musanoq’ir Shrine
- Pup’uqe Sanctuary
- Sequ’nom Shrine
- Nin’isi Shrine
- Eqotiu Sanctuary
- Tenma’at Shrine
- Qiqa’un Shrine
- Siqu’qusi Sanctuary
- Minetaq Shrine
- Maia’oqo Sanctuary
Musanoq’ir Shrine

Musanoq’ir Shrine in Zelda TOTK
- During the first puzzle of this sanctuary we will have to use the ultra hand and dock the metal ball next to the big cube on the other sidein order to build a bridge.
- Subsequently we will have to play with the weight and balance of the metal ball. Use the ultra hand and lift the ball, along with the attached cube, as high as you can, so that have travel and speed, so it will hit the target.
- For the last room of the sanctuary, couple the trunk to the upper part of the bar. After the big block of iron together with the ball in the lower area. Pull and lift the cube to the maximum so that gravity and momentum run do the rest.
Pup’uqe Sanctuary

Pup’uqe Shrine in Zelda TOTK
This is a bounty sanctuarySo there won’t be much to do. Complete the Heroic Trial “The Stone and the Apples” from Romell, a Forest Kolog.
Sequ’nom Shrine

Sequ’nom Shrine in Zelda TOTK
This is a bounty sanctuary, so we will not have any puzzle to do. Complete the heroic test “No Trespassing?” of Magnoll, a forest kolog.
Nin’isi Shrine

Nin’isi Shrine in Zelda TOTK
This is also a bounty shrine, so we will not have any puzzle to do. Complete the heroic test “Otil’s Special Place” for Otil, a forest kolog.
Eqotiu Sanctuary
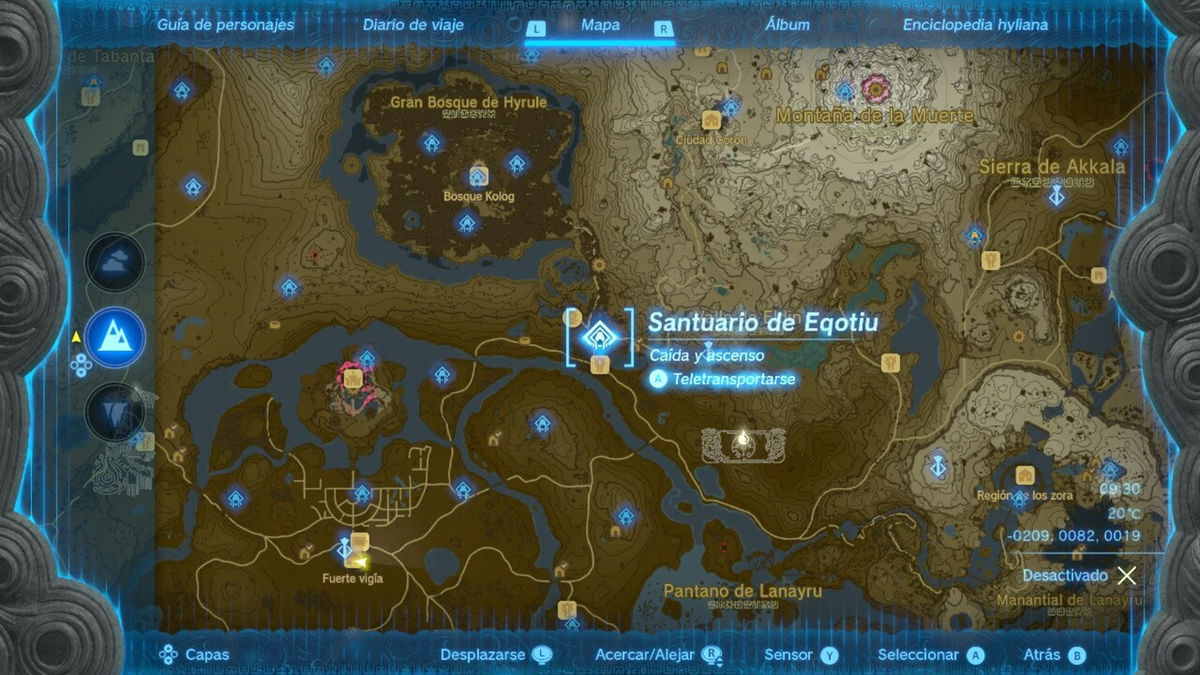
Eqotiu Shrine in Zelda TOTK
- in this sanctuary we will always have to play with the power of recoil. Our first room will be use that power with the platform coming our wayafter getting on we can push it back and get to the other side.
- Later we will have a box that falls from a higher place. It is simple, go up and more of the same, go back to reach the point of origin from which the box came and thus advance to the last part.
- In the last room we will have to take with the ultra-hand the big box that is on the left hand side and throw it on the button that activates the spring ahead. Our next step is push the box back a bitonly for rise and fall againbut with us prepared in the springThat’s how we’ll get to the altar.
Tenma’at Shrine

Tenma’at Shrine in Zelda TOTK
This is a bounty sanctuarytotally free and simply for discovering it and completing the cave that leads to it.
Qiqa’un Shrine

Qiqa’un Shrine in Zelda TOTK
- This sanctuary is based on darkness, and we will need carry the light. Also to get to the altar we will need a key.
- The path to the key will be along the path attached to the left. The first following the path to the leftthe next in the right and by that detour we should see later two spiked walls closing in. Go quickly and further on, all straight, glued to the left wall. We will see one more wall with spikes. Something ahead awaits us a piece of illuminated floor that we can remove with the ultramano. There is the chest with the key, it only remains to undo what has been done to complete the sanctuary.
Siqu’qusi Sanctuary

Siqu’qusi Shrine in Zelda TOTK
- in the first room use the power of recoil with the big gear above the doorso the falling ball can go in the opposite direction and land in an activation zone to open the door.
- In the next room the puzzle is similar. Use the ultra-hand to turn the crank. After a while you will be able to use the recoil power with the big wheel to get you up and take you to the height of the altar.
Minetaq Shrine
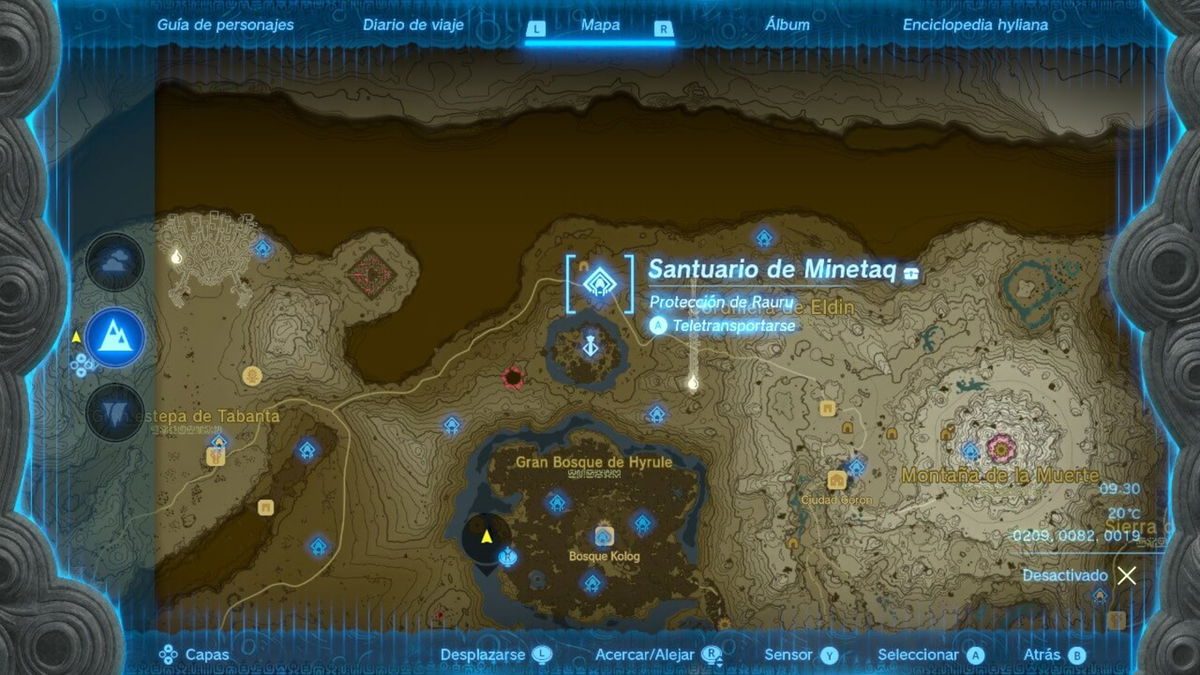
Minetaq Shrine in Zelda TOTK
This sanctuary is rewardingsimply by finding it and completing the cave near the area in which it hides.
Maia’oqo Sanctuary

Maia’oqo Shrine in Zelda TOTK
- To begin with, get on the spring and from above you will be able to see what needs to be done. We will have to take the ball through the lanes until it falls on the button. To do this, use your ultra-hand to move the ball, and when it is moving and near the right moment of drop shoot a quick arrow at the orange pillarto activate it and make way for the button.
- The next room follows the same mechanics. Climb on the spring platforms to shoot up completely. There we will see the ball, as you put it on the ramp to go down with the ultramano, run and go down to activate the pillarand so make way for the button again. It takes a lot of foresight in this case, so stay tuned.